SharePoint 2010 Service Application Development 101 - Admin UI and PowerShell
In this post we explore how to configure various aspects of a SharePoint 2010 service application. This includes building some customizations in the application pages and extending the service applica
In this post we explore how to configure various aspects of a SharePoint 2010 service application. This includes building some customizations in the application pages and extending the service application with powershell scripts. It is really up to your imagination when it comes to what you want to include and how you want to manage your service app, SharePoint gives you a tremendous amount of flexibility when it comes to these things. This is part 4 of a short series on developing service applications in SharePoint 2010:
- Part 1: Getting Started with SAF + Starter Solution (with Logging / Configuration / Service Locator)
- Part 2: Custom Service Application - Logical Components
- Part 3: Custom Service Application - Base Solution
- Part 4 (This Post): Custom Service Application - Full Infrastructure (with Admin UI and PowerShell)
- Part 5 (Final): Custom Service Application – Integrating features and capabilities into your service application (sample MailChimp integration)
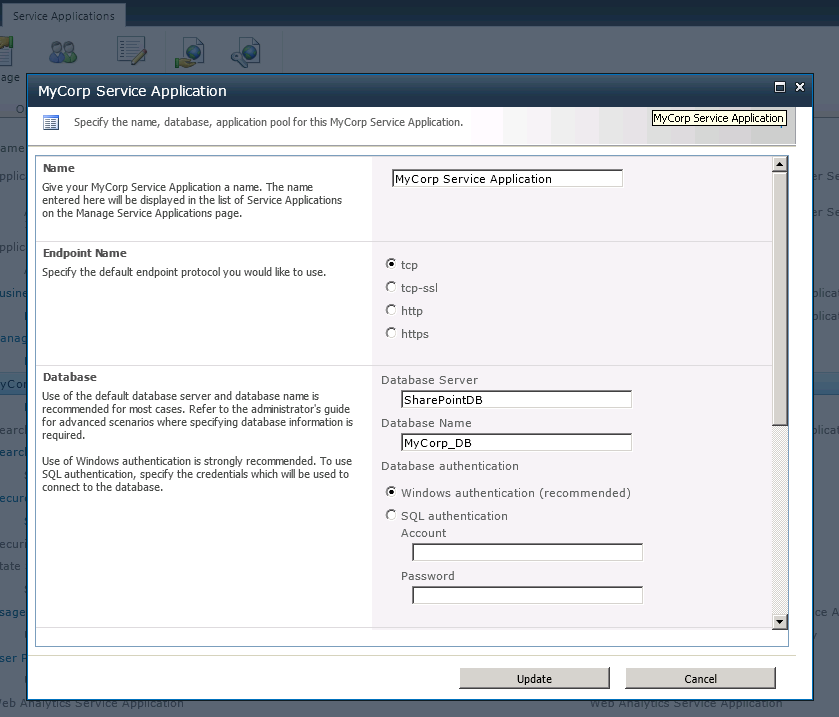
Service applications in SharePoint have Properties pages. You have complete control over these. In this sample service application, I added the option for administrators to pick the endpoint protocol they would like to use in their service calls. This is also how you manually create the service application, where you specify the application pool to use (or create a new one), and also provide the server name and the name of the database(s) to use in support of your application (I like to setup my servers with aliases, so in the screenshot below: SharePointDB is actually pointing to a SQL Server instance, many consider this a best practice with SharePoint – 101 tip).
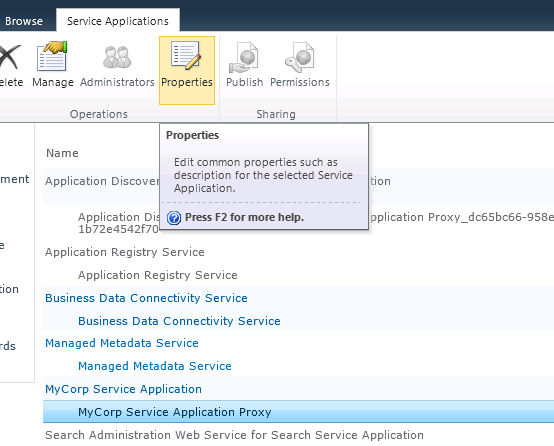
 The same is done for the service application proxy. Just click on the MyCorp Service Application Proxy and click on Properties.
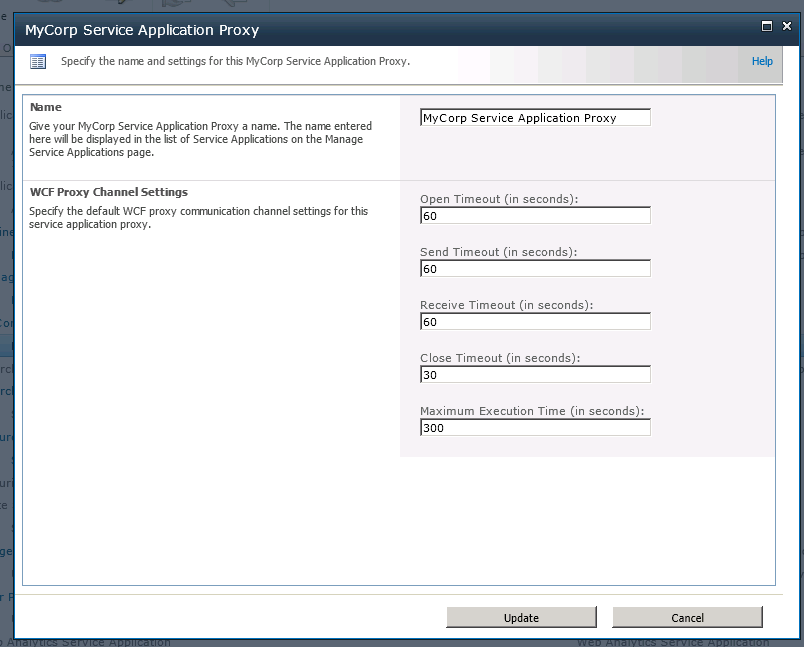
 You’ll now be able to change various timeout settings and default settings for your WCF channel communication.
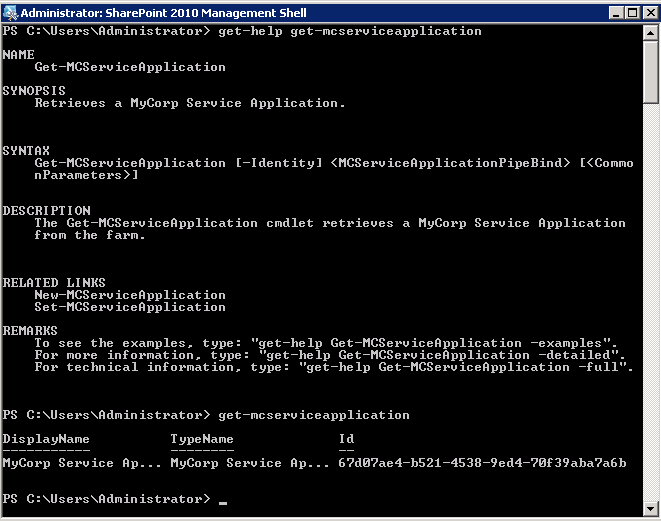
 You can also manage your service application and it’s properties using PowerShell. I added some basic PowerShell commands to the project (download is provided at the end of this post) that will appear upon deployment in your SharePoint powershell console.
 Publishing custom commands to your SharePoint PowerShell console is easy, but it’s time-consuming. You first write a cmdlet, like the following one:
using System.Collections.Generic;
using System.Management.Automation;
using System.Security;
using Microsoft.SharePoint.PowerShell;

namespace MyCorp.SP.ServiceApplication.PowerShell
{
    public sealed class GetMCServiceApplication : SPGetCmdletBase<mcserviceapplication>
    {
        private MCServiceApplicationPipeBind _pipeBind;

        protected override IEnumerable<mcserviceapplication> RetrieveDataObjects()
        {
            if (this.Identity != null)
            {
                base.DataObject = this.Identity.Read();
            }
            var list = new List<mcserviceapplication>();
            if (base.DataObject == null)
            {
                Log.Debug(LogCategory.ServiceApplication,
                          "GetMCServiceApplication.RetrieveDataObjects: Identity not specified. Returning all applications");
                foreach (var application in MCServiceUtility.GetApplications())
                {
                    try
                    {
                        application.DemandAdministrationReadAccess();
                        list.Add(application);
                        continue;
                    }
                    catch (SecurityException)
                    {
                        Log.InfoFormat(LogCategory.ServiceApplication,
                                       "GetMCServiceApplication.RetrieveDataObjects: User does not have access to MyCorp Service Application {0}",
                                       application.Name);
                        continue;
                    }
                }
                return list;
            }
            Log.Debug(LogCategory.ServiceApplication,
                      "GetMCServiceApplication.RetrieveDataObjects: Returning the object specified by Identity");
            list.Add(base.DataObject);
            return list;
        }

        [Parameter(Mandatory = false, ValueFromPipeline = true, Position = 0)]
        public MCServiceApplicationPipeBind Identity
        {
            get { return this._pipeBind; }
            set { this._pipeBind = value; }
        }
    }
}
Then you register it in SharePoint using a SharePoint solution, with an xml file:
Get-MCServiceApplication MyCorp.SP.ServiceApplication.PowerShell.GetMCServiceApplication MyCorp.SP.ServiceApplication.PowerShell-help.xml
Set-MCServiceApplication MyCorp.SP.ServiceApplication.PowerShell.SetMCServiceApplication MyCorp.SP.ServiceApplication.PowerShell-help.xml
New-MCServiceApplication MyCorp.SP.ServiceApplication.PowerShell.NewMCServiceApplication MyCorp.SP.ServiceApplication.PowerShell-help.xml
And it’s a good practice to also include a help file so that users have all the info needed to know how to use the cmdlets you’ve written. The help file for the 3 cmdlets is also in the download. In the last 4 posts, we created a complete service application infrastructure to integrate 3rd party systems and/or build custom enterprise applications within your SharePoint farm. I’m going to hunt down a simple 3rd party system (something I haven’t played with yet) that I can showcase to give an example of how you can use this infrastructure in the way I describe. But if you’ve been following this series, I’m sure you already get the idea, but I think this will be a nice way to wrap up the series. Thanks for reading. [Code Download](https://skydrive.live.com/redir?resid=30FD0C7F694C1B3F!293&authkey=!AJ9mKTemY0vGR\_4) Have fun! Use at your own risk :-)
Comments
Comments are moderated. Your email is never displayed publicly.